
Timbral Box
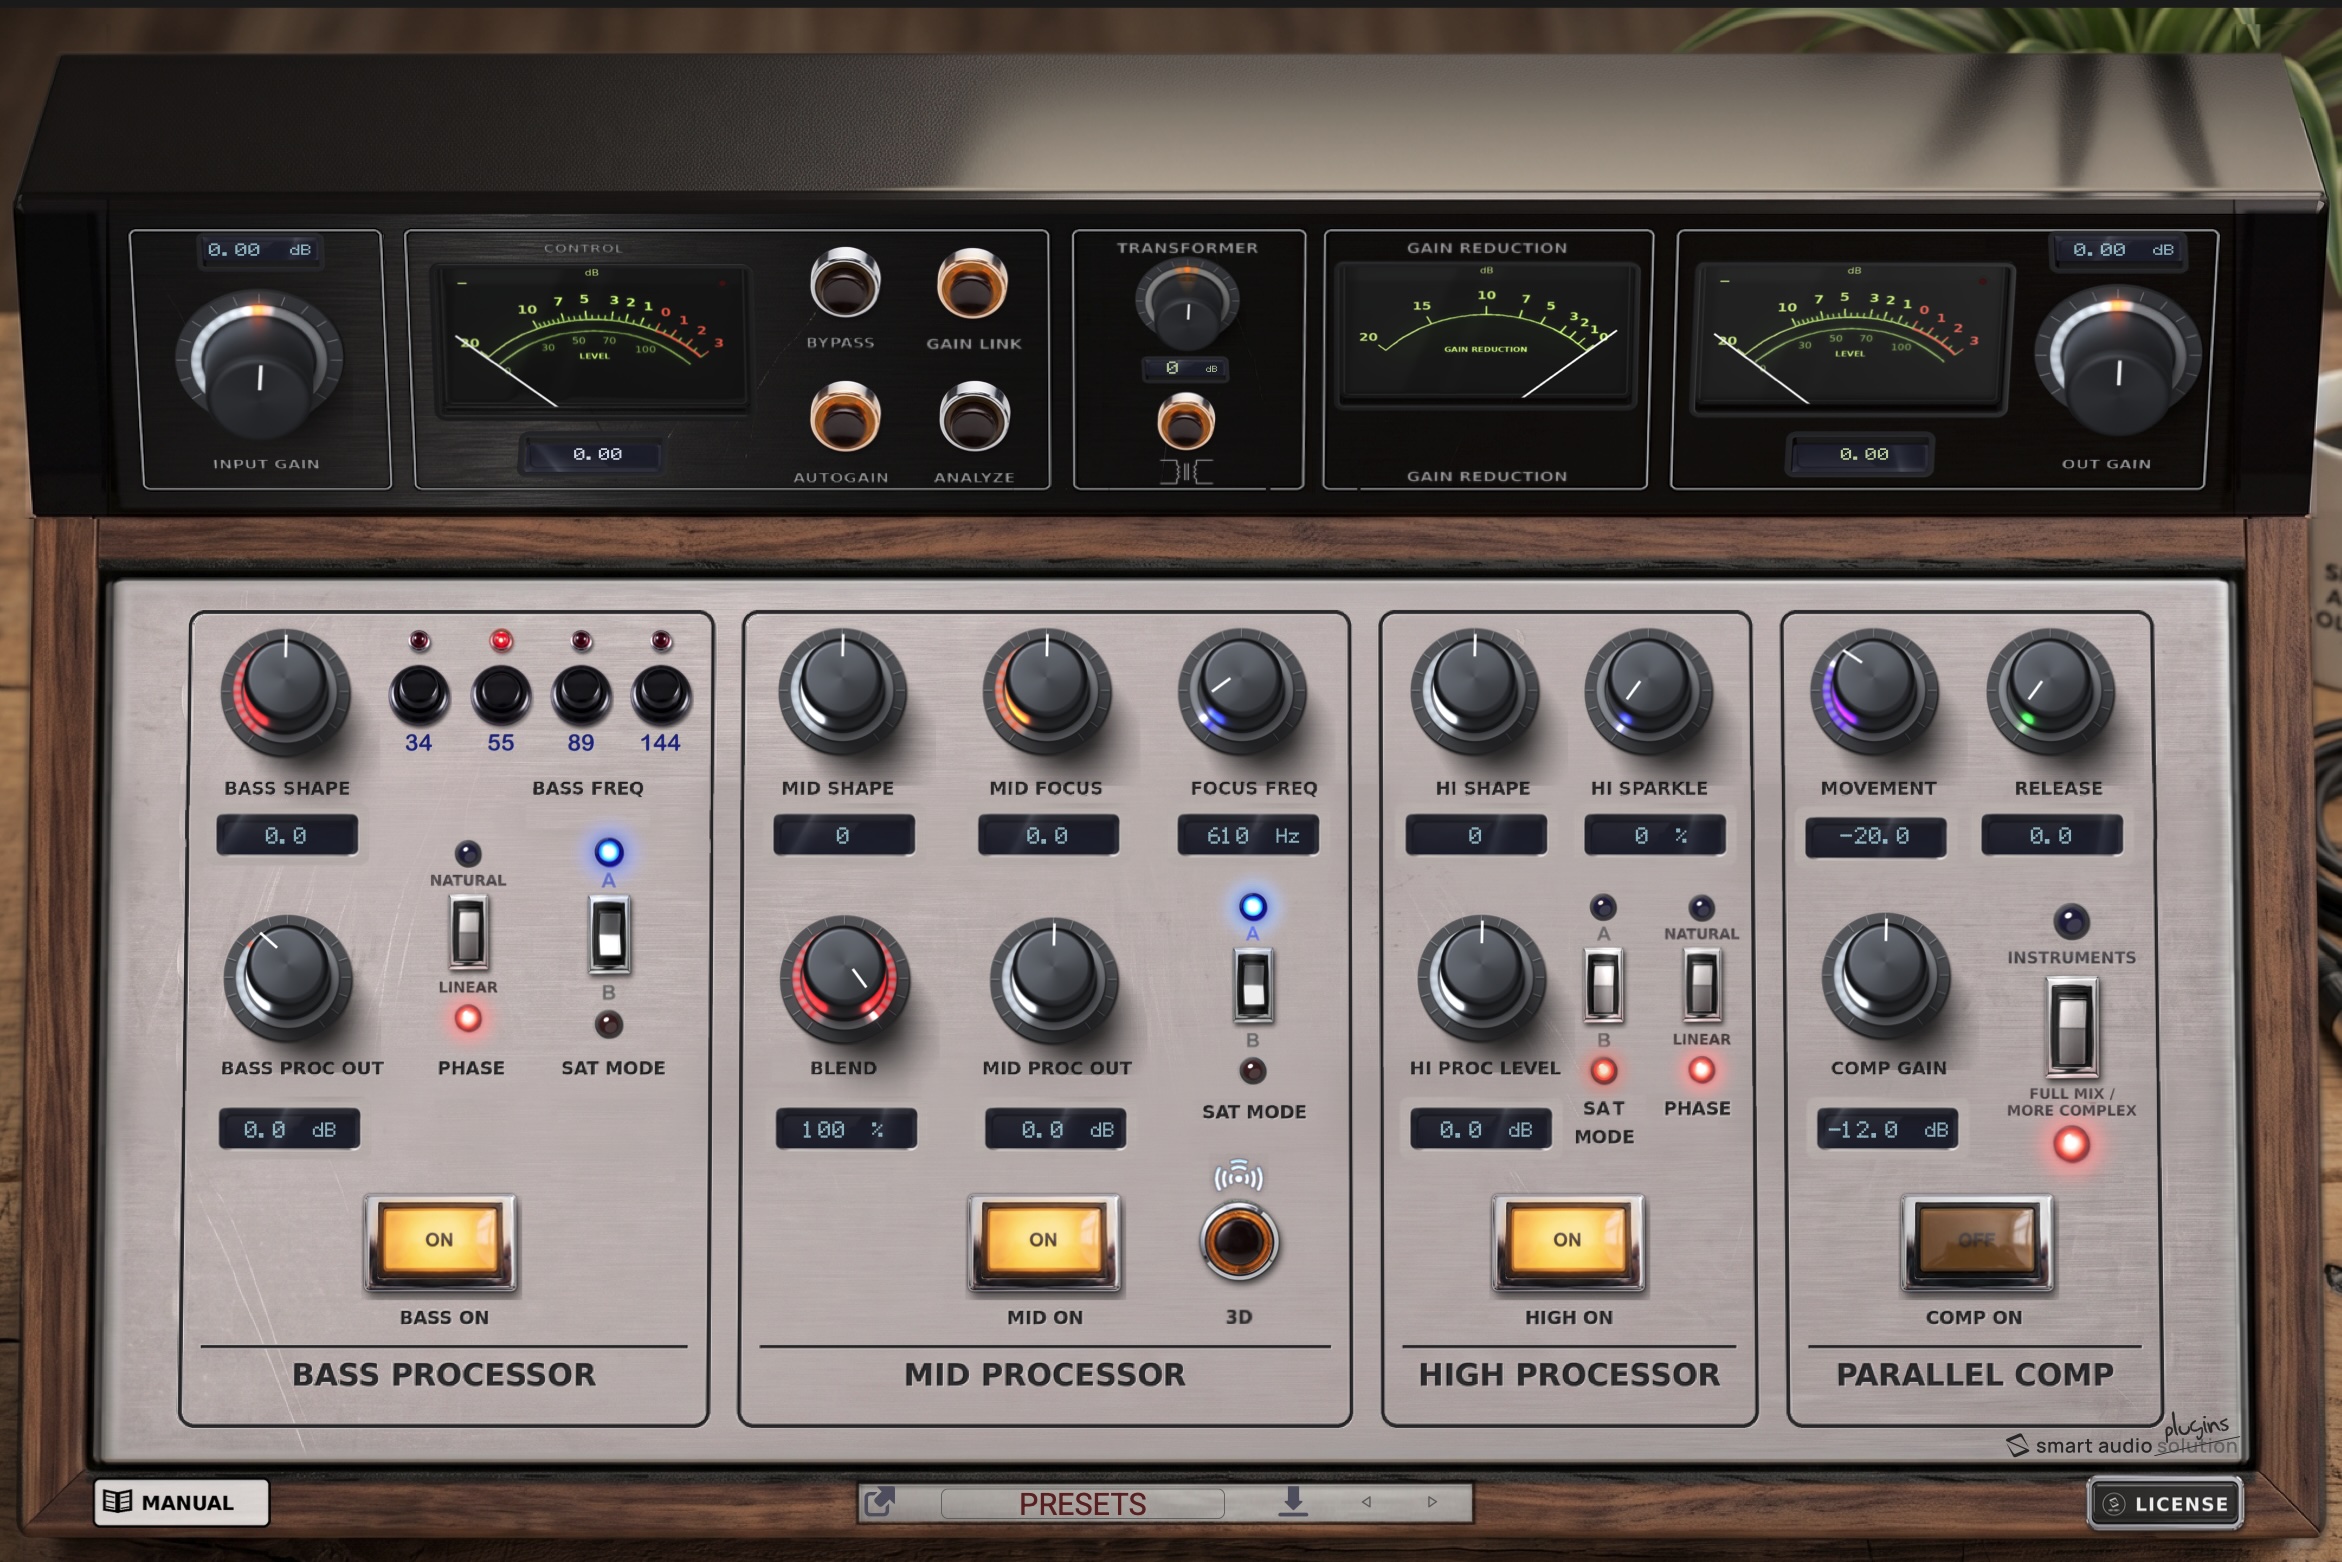
Timbral Box
Harmonics are a volume control. Presence, emphasis and, if you want, compression — all in parallel, through musical harmonic saturation. The source stays where it was.
AAX, AU, VST3 · 64-bit only · macOS and Windows
Sold and delivered through Audioloom
A parallel harmonics EQ / enhancer
Nowadays we all seek volume and the perception of a present sound; however, this often comes at the cost of too much compression. Timbral Box creates presence, emphasises the sound and, if desired, adds compression — but all of this takes place in parallel and through musical harmonic saturation.
The concept is to keep the source as unaltered as possible while generating harmonics, or adding presence, around it. Each section introduces, in parallel, not only harmonics but also a portion of the signal filtered differently across the three bands. What you hear as “more presence” or “more bass” is harmonics sitting next to the sound — not EQ or compression on the sound.
The process behind the scenes is very dynamic and musical, and it varies from section to section. You can always think of Model A as a less distorted model, more oriented toward clipping, and of Model B as a combination of clipping and saturation that dynamically interacts with the Shape parameter.
Section by section
One black panel on top, four modules on a wooden case. The unit is calibrated so that VU zero sits at −12 dBFS; I recommend working around −18 dBFS.
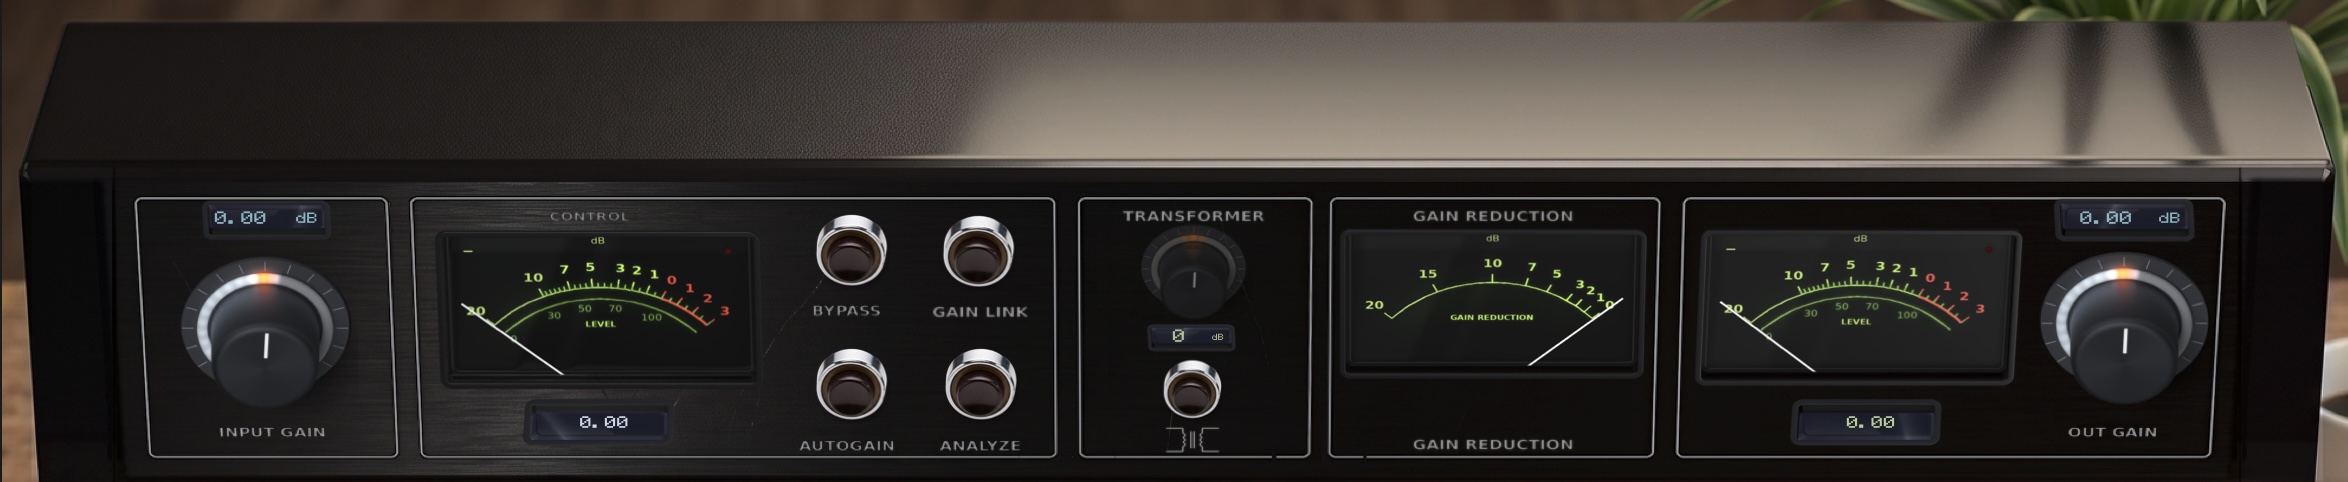
Input, Autogain, Gain Link, Transformer, Output
The transformer section alone is worth the entire plugin.
From left to right: Input knob and input meter. This plugin is calibrated to operate at −12 dBFS, although I recommend staying at −18 dBFS. The VU zero here corresponds to −12. In the next section you’ll find the bypass functions (do I really need to explain what these are for?) and the extremely useful Autogain function. To prevent automatic volume fluctuations, I’ve included the Analyze function. As soon as you turn it on, it analyses the current state by default and creates a match between the input and output. If you make significant changes to the parameters, I recommend using the Analyze button to update the compensation settings.
Gain Link: this function creates a gain compensation link between input and output. The link is made proportionally, in the state in which it is switched on: engage it with the input at −5 dB and the output at 0 dB, and that proportional state of −5 dB is held.
Tip: once the setting sounds right, try changing the input level by a few dB with Gain Link engaged. This acts as a further fine tuning of the sound, because it changes the behaviour of the whole chain in proportion.
Transformer: this section alone is worth the entire plugin! A transformer stage from an esoteric 1970s processor… two massive, rich-sounding transformers controlled by the saturation knob; this parameter modulates the transformer stage in different ways.
The gain reduction meter shows you how much and how the parallel compression section is working. Output… is the output!
Bass Processor
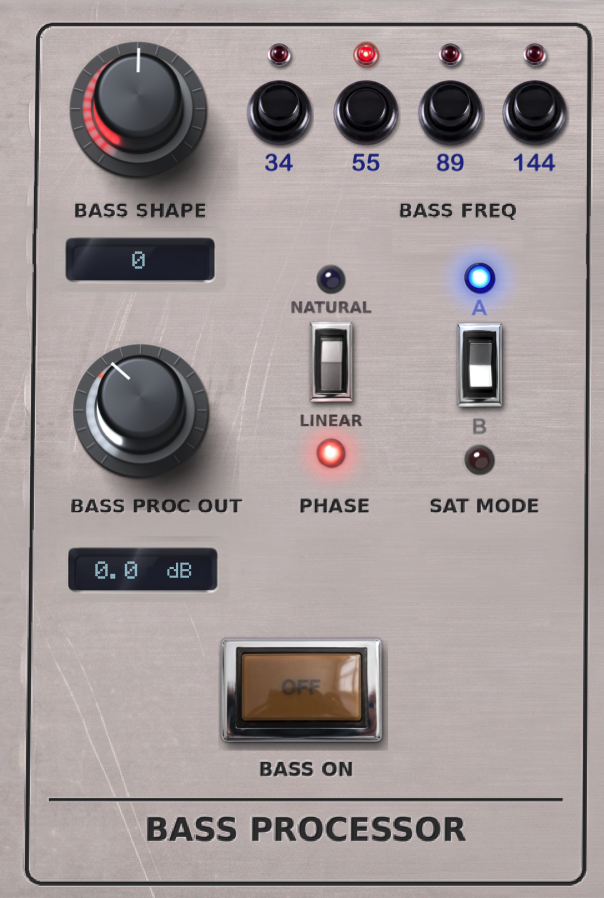
Bass Shape is the parameter I recommend you experiment with first.
Bass Shape: when you move the saturation curve counterclockwise (negative), the sound in general becomes “freer”: the bass takes on a very interesting character — not only more prominent, but the transient stays free and the harmonics resonate more, which reads as a lengthening of the sound and gives the low end more depth. Clockwise (positive) the effect is tighter and more solid. As always, experiment with the music you’re working with.
Frequency selector: shifts the processor’s operating centre between 34, 55, 89 and 144 Hz. The frequencies were chosen by ear and, believe it or not, they follow the Fibonacci sequence — and it always sounds better on these cuts.
Phase: whenever possible I recommend linear phase, even if it adds latency. On individual instruments natural phase works well. On buses and master, always linear. Sat Mode: no rules here — A is less dense, which is sometimes all you need; B creates more diffuse and compact harmonics. Two different sounds.
Mid Processor
The busiest area, and for good reason: it can significantly improve or worsen the sound.
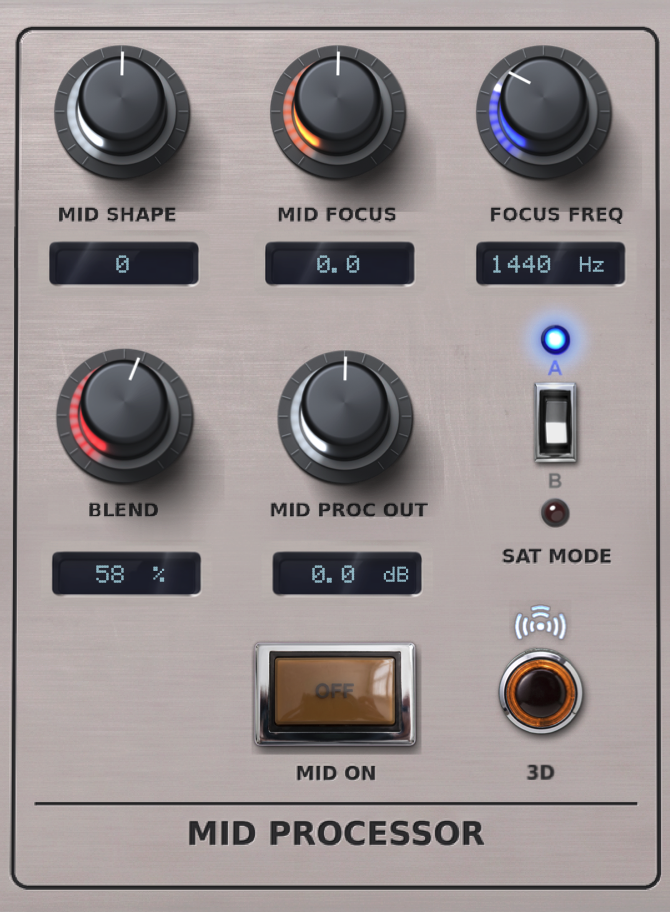
Starting point: Sat Mode A and Blend at 0%. This way the processor acts as a pure parallel equaliser — useful when you want to give the midrange a subtle presence without adding any particular tone.
Blend affects only algorithm A and changes the harmonic curve it produces; it lets you do very subtle sound shaping in both modes. Mid Shape, as in the bass section, has a big impact on both the harmonics and the transients: here you can “compress” or “lengthen” the sound. Start at zero, find the focus frequency and algorithm, then try positive and negative values.
Mid Focus & Mid Freq drastically change the tonal centre of the harmonics. Set Mid Focus to its maximum positive and negative values to find the right frequency, then start from zero again to find the sweet spot. 3D adds depth without touching the phase.
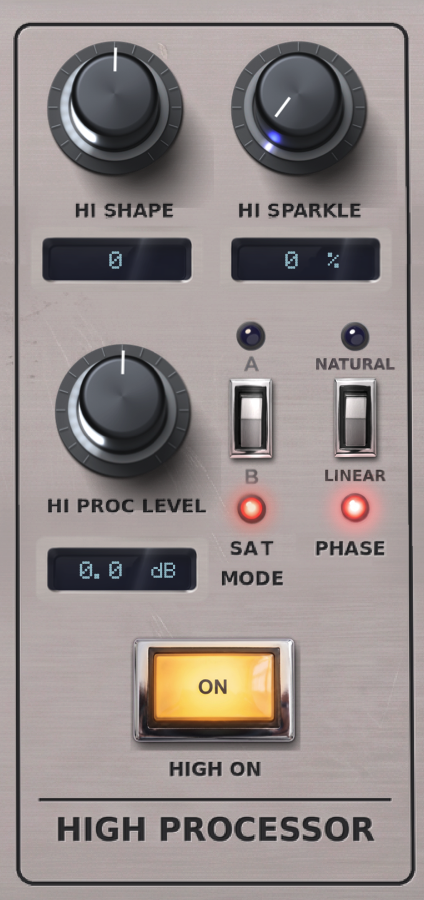
High Processor
Hi Sparkle: use it with caution. Your ears get used to it quickly.
Hi Shape: the same rule as the other sections. Hi Sparkle adds an extra boost to the high frequencies, in parallel — too much high end isn’t always what you need. Sat Mode works like the other algorithms, with a calibration made for this range. Phase: on some individual instruments the natural mode works well; in general, whenever possible, linear.
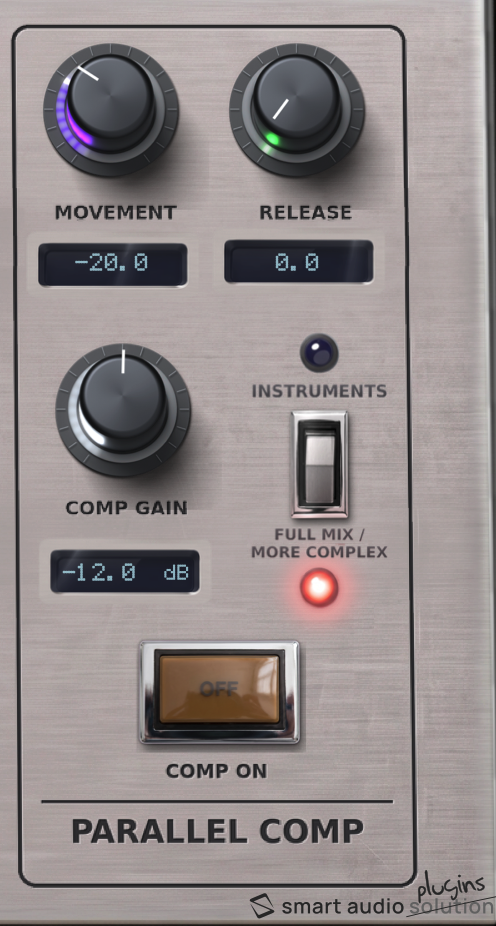
Parallel Comp
Don’t think of this as a classic compressor.
It’s a section that enhances the perceived quality of the sound while keeping the transients intact — or a colouriser for loops and drums, using Mode A and the Movement parameter. Movement controls both the threshold and the curve the compressor operates on; together with Release it lets you create musical movement around the source.
Compressor mode — Instruments / Full Mix. Warning: Instruments mode is designed for sound design and tone shaping; on a full mix, or on instruments where you don’t want to alter the sound too much, it can cause damage. When you want certain elements of a single instrument to resonate or “vibrate”, it can be very rewarding. It’s a cross between a multiband compressor and an OTT — de facto a compander shaped by the Movement knob. On a drum bus or drum loops it creates a very colourful, beautiful dynamic movement. Experiment.
Sound examples
Every example has two versions: Processed and Dry. Switch between them while it plays — the position is kept, so you hear the same bar treated and untreated. Only one example plays at a time.
The box, in use
Level-matched, bypass toggled. Headphones or monitors if you can — YouTube re-encodes the audio and the smaller moves get lost.
Timbral Box in Action
One parallel harmonic processor, many sources
Timbral Box on Drums
Parallel saturation on a drum bus
Timbral Box on Acoustic Guitar
Presence without EQ
Timbral Box on Full Songs
Mix bus saturation before mastering
Timbral Box Mastering Settings
Transformer saturation on the mix bus
DAW support
AAX, AU and VST3 — 64-bit only.
- Ableton Live 11+ — Mac & PC, AU / VST3
- Bitwig 4+ — Mac & PC, AU / VST3
- Cubase 13+ — Mac & PC, VST3
- Digital Performer 11+ — Mac & PC, AU / VST3
- FL Studio 23+ — Mac & PC, VST3
- GarageBand 10+ — AU
- Logic Pro 10+ — AU
- Pro Tools 12+ — Mac & PC, AAX
- Studio One 5+ — AU / VST3
- Reaper 6+ — Mac & PC, VST3
- Cakewalk by BandLab — PC, VST3
AAX is a trademark and software of Avid Technology. Audio Units is a trademark and software of Apple Inc. VST3 is a trademark and software of Steinberg Media Technologies GmbH.
System requirements
- macOS 10.15 or higher — Intel and Apple Silicon native
- Windows 10
- RAM 4 GB minimum, 16 GB recommended
- Disk 200 MB free on the system drive
- Formats AAX, AU, VST3 — 64-bit only